The Roku® Outdoor Camera SE delivers a full HD image and great features, like color night vision, instant notifications, two-way audio, motion detection, sound detection, weatherproofing, a rechargeable battery, and a siren. With a Roku Smart Home subscription, you can store recordings in the cloud and detect people, pets, and packages. Your camera comes with everything you need to get started: a base station, power adaptor, USB cable, Ethernet cable, and mounting hardware.
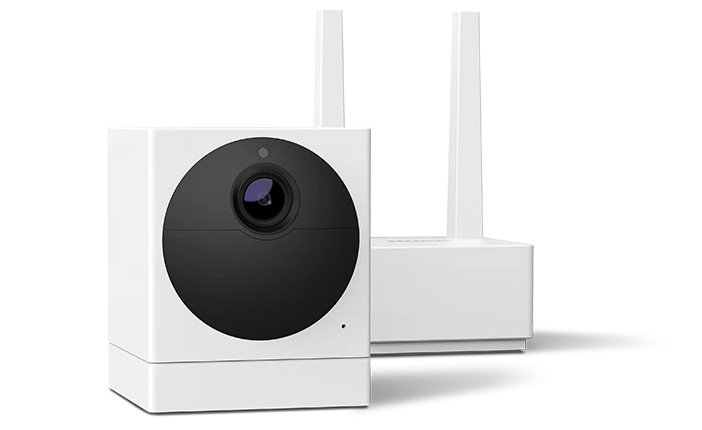
What’s in the box
- Outdoor camera
- Base station
- USB cable & power adapter
- Ethernet cable
- Mounting hardware
Install the smart home app
The Roku Smart Home mobile app is a free application for iOS and Android that lets you set up, configure, and control your Roku home monitoring system, cameras, video doorbells, plugs, bulbs, and light strips. You can download the smart home app from the appropriate link below.
You’ll also need:
- 2.4GHz Wi-Fi
- Smartphone or tablet with Roku Smart Home app (iOS or Android)
- Power outlet (or optional Roku Solar Panel)
 Quick Start Guides
1. Charge and power your camera
- Open the weatherproof cover on the camera
- Connect the included USB cable to the camera and a power source (base station USB port or 5V/2A outlet)
- Status light flashes red while charging and turns solid red when fully charged (~4 hours)

Note: Charge fully before setup
2. Connect the Base Station
- Open the Roku Smart Home App and login or learn how to create one
- Tap the plus sign
 from the navigation bar and select Add device
 - Select Cameras & Doorbells and choose Base Station
- Connect your base station to your router with the included Ethernet cable
- Plug it into a power outlet (12V/1A)
- Status light will turn solid blue when ready
3. Pair your camera
- Select Add Outdoor Camera or tap the plus sign at the top of the screen. Then tap Add device, select Cameras & doorbells, and choose Outdoor Camera.
- Keep the camera within 6 feet of the base station
- Slide the power switch on the camera to “On.” Status light flashes blue.
- Tap Sync in the app. Status light flashes yellow and blue during pairing.
- When setup finishes, the light turns solid blue and your camera is ready.
- Name your camera in the app
Note: Base stations support up to 4 cameras. After setup, you can switch the base station to Wi-Fi if needed.
Where to install your outdoor camera
- Be sure to place the camera on a flat surface or mount it in an unobstructed location.
- Find a spot away from direct sunlight, busy roads, and dense brush.
- For help attaching it to a wall or ceiling, check out some mounting tips for Roku Smart Home cameras.
Tip: If you mount your camera to a ceiling or other spot where it is upside down, you'll need to flip the live view in the Smart Home app. After setup is complete, select your camera in the app and go to Settings > Advanced Settings > Rotate Image 180°.
| Status light | Status |
|---|---|
| YELLOW - Solid | Camera is on and beginning setup |
| YELLOW and BLUE - Flashing | Pairing to base station |
| BLUE - Flashing | Connecting to Wi-Fi |
| BLUE - Solid | Connected to network |
| RED - Flashing | Charging |
| RED - Solid | Fully Charged |
| No Light | Camera is off or sleeping |
Key Features
- Motion & sound alerts
- Two-way audio – talk and listen through the app
- Color night vision
- Cloud recording (with subscription) or microSD card storage
- Solar panel compatible
Troubleshooting
Camera won’t connect or stops working
- Check the status light
- Flashing yellow & blue: Pairing in progress
- Solid blue: Connected
- Red flashing/solid: Charging or fully charged
- Check battery
- Fully charge the camera (~4 hours) before setup.
- If battery is low, the camera may not connect properly.
- Check Wi-Fi signal
- Open the Roku Smart Home app > Device info > Signal strength.
- If weak, move camera or base station closer to Wi-Fi router. See more camera-specific Wi-Fi troubleshooting.
- Restart the camera
- Open the weatherproof cover > slide power switch to OFF, wait a few seconds, then switch back on.
- This will not erase settings or remove the camera from your Roku account.
Base Station Issues
- Base station won’t connect or loses connection
- Check status light
- Solid blue: Ready
- Flashing: Not fully connected
- Check network connection
- Wired: Ensure Ethernet cable is securely plugged into both router and base station. Try a different port or cable if needed.
- Wi-Fi: Ensure strong signal if switching from wired to wireless. Move base station closer to router if needed. Learn more about troubleshooting Internet connection.
- Restart the base station
- Unplug power for 30 seconds then plug back in
- Factory reset (last resort)
- Press the pinhole button labeled Reset next to the USB port with a paperclip and hold for 10 seconds
- Retry setup after reset
Battery and performance tips
- Limit live view streaming and frequent event recordings. Learn how to change when your camera records events.
- Install in low-traffic areas to reduce motion alerts.
- Fully charge before first use and periodically top off for longer battery life.
Related articles
Last updated at 6/25/2026 9:47:06 PM
Was this article helpful?
Related articles
Need more help?
